« Building a tube amp from scratch – the cost-effective alternative for skilled DIYers »
Over the past decades, there have been outstanding tube amplifiers that thrilled with their excellent sound and, in some cases, shaped entire music genres – Fender Tweed, Black Face, Plexi, and more have changed the history of music. Unfortunately, these classics can now only be acquired for gigantic sums, as the sound and feel of vintage tube amps are hard to replace. But there is an alternative to taking out a medium-sized loan: building an amp yourself and customizing it according to your own preferences. Today, we’re talking about DIY kits, tube amplifier construction, and everything that goes with it!
Tube amplifier DIY – what is possible?
While tube-based amplifiers are analogue devices with manageable technology, building an amplifier from scratch is a real challenge. However, with the necessary patience, the right equipment, and a good dose of knowledge, excellent results can be achieved. We present three possibilities.

Tube amplifier DIY – Extensive Restorations
The first, and least ‘technical,’ option is the extensive restoration of a defective, old device. The advantage is clear: the blueprints of the old originals are available online, and many YouTube videos can be found to repair these old treasures. With the right replacement parts, knowledgeable amateurs can restore seemingly scrap amplifiers. However, this fact has not gone unnoticed by sellers either: prices, even for severely defective devices, are continuously rising. Another often significant disadvantage is that many old defective devices have already undergone one or more failed repair attempts. Depending on the approach, valuable original parts may have been removed, altered, or destroyed. The analysis of a defective device can only be carried out by a professional!
Tube amplifier DIY – Complete New Construction
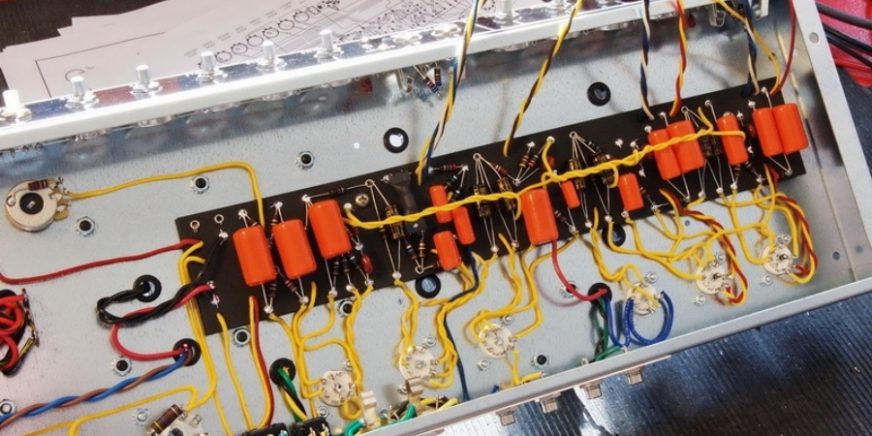
The more demanding approach is likely the complete new construction. In this case, all parts of the amp are handpicked, chassis are built and covered, tube sockets are selected, and the entire electronic components are designed from scratch. Clearly, this creates true individualists among tube amps. However, especially in the case of complete construction, there are often small but crucial errors. Incorrectly or poorly matched components do not harmonize as they should. Chassis may not meet the demands of the tough stage life, or speakers may just not sound right.
Such projects quickly devour an enormous budget – unfortunately, without presenting a corresponding value in the end.

Tube amplifier DIY – TAD Amp Kits
For those who don’t want to venture into a complete DIY build and don’t want to wait for a well-preserved vintage device, Tube Amp Doctor offers a fantastic alternative: TAD Amp Kits!
With hand-picked, carefully matched parts of the highest quality and inspired by the greatest names in both recent and vintage tube amplifier history, TAD Amp Kits come with everything needed for a true boutique amp. The kits are thoughtfully selected by TAD to closely resemble the originals and are assembled into various sets. Depending on your needs, everything from the smallest screw to the chassis is included, providing ambitious DIYers with all they require to create their tube amplifier. Of course, we may be biased. Nonetheless, these kits offer a unique opportunity for technically inclined guitarists. That’s why we’ll delve into the details of working with TAD kits in the following parts of this article, shedding light on who is suitable for a DIY build, what prerequisites need to be met, and also, the different variations of kits available.

Who are the TAD Amp Kits suitable for?
To build a tube amplifier entirely on your own, you don’t need to be an electrical engineer, but having a certain basic knowledge is definitely a prerequisite. Different skills are required for various steps of the process, and these should be learned beforehand. Because, if you’re placing your first solder joint on a tube amplifier, you can’t expect to end up with perfectly wired electronics. In addition to all the technical skills, those who want to build their amplifier instead of buying one also need a sense of sound and tactile perception. After all, the greatest part of the fascination with old, high-quality tube amplifiers comes from their sound and feel.

We recommend thoroughly familiarizing yourself with the original before embarking on a major project, such as assembling a TAD Amp Kit. The desired sound should be in your ear, and the amp’s responsiveness should be at your fingertips to perfectly optimize your own amplifier. Therefore, we recommend DIY only for experienced technicians who also possess a significant amount of musical experience. It’s not for nothing that they say tube amplifiers ‘live’: A perfect technical copy of an amp alone doesn’t always deliver the desired character.

What requirements should be met before building an amp kit?
To achieve the perfect sound, the work on a tube amplifier should be as professional as possible. We have compiled a list of what is essential for the project:
Tools for DIY Construction
To transform the DIY kit into a tube amplifier, you will need various technical equipment for amps:
- Screwdrivers, wrenches, pliers, files, hammers, and more
- Soldering station with a high-quality soldering iron, a ‘third hand,’ and accessories
- Measuring instruments for calibrating the electronics
- Insulating tape, adhesive, paint – as needed

The correct location for DIY construction Building an amp from over 200 individual parts doesn’t happen in an afternoon. Therefore, there are some tips to consider when choosing the right workshop location:
- Quiet, undisturbed work environment
- Dust-free, well-lit workspace
- Large work surface with the ability to store all parts sorted
Personal requirements for DIY construction Tools and workspace prepared? Ok, then the last checklist needs to be ticked off before you can start – what are the personal requirements for tackling the DIY amplifier construction project?
- Experience in handling technical devices
- Adherence to safety rules when dealing with high voltage
- Safe use of soldering iron and measuring devices
- Patience, calmness, and a willingness to experiment
If all of this is in place, then you’re ready to go!
The Amp Kits from TAD
TAD offers a variety of specially curated amp sets that closely adhere to the original in terms of appearance and sound. The different kits provide the opportunity to acquire big sounds at a relatively affordable price. Depending on personal preference and the pursued sound idea, TAD offers various models as sets:
All amplifier kits feature high-quality components and authentically convey the typical vibe of their respective series. Pre-aged tweed treated with nitrocellulose lacquer, ceramic sockets, cloth wire, and Orange Drop capacitors – all top-notch and fresh from the TAD warehouse!
By the way, completed amp kits can also be purchased as amplifiers – so DIY is not necessarily required!

Tube Amplifier DIY – Conclusion
Whether it’s a complete DIY, the restoration of an old amplifier, or the assembly of a high-quality amp kit from TAD: Building a tube amplifier is not for technical novices.
However, for those who have delved into the principles of amplifier technology, possess the necessary musical know-how, and have the right conditions for working with the kit, a self-built amplifier can achieve the ultimate in personalized sound! After all, anyone can buy an amplifier.
___________________________________________________________________________________________________________________________
Image sources::
Circuit diagram, tubes, and soldering iron: © SirChopin – stock.adobe.com
Hands of a guitar player : © Oleksii- stock.adobe.com