« Frequent Errors and Problems »
Today, we are examining the most common issues and errors with tube amplifiers and seeking solutions. Which defects can be resolved through amplifier repair on your own, and when is it necessary to turn to a professional? And what symptoms does an amp exhibit when suffering from these issues? Welcome to amp repair with step-by-step instructions from TubeAmpDoctor.
Tube amplifiers have experienced a true renaissance in recent years.
High-quality tubes still provide the best sound one can wish for their guitar. However, tube amplifiers are not without problems. Electron tubes are subjected to high thermal loads during operation and can lead to sound or operational issues with the amp after a while. Before we dive into the amp itself, we provide a step-by-step guide for troubleshooting.

Symptoms of a Faulty Tube Amplifier
Tube amplifiers are complex electronic devices whose individual components can develop defects under certain conditions. These defects manifest in various forms. The typical symptoms of a faulty tube amplifier are listed below.
Background Noise
If there are crackling or popping noises during the operation of the tube amplifier, it not only disrupts the sound of the guitar. Defective tubes may be the cause of these background noises. If the noises occur whenever specific controls or potentiometers are used, a worn-out potentiometer may also be the reason for the sounds.

Microphony
Some tubes develop a tendency towards “microphony” over the course of their lives. The affected tube may exhibit feedback despite the guitar being played at a low volume. The annoying signals usually cease when the guitar is played loudly, and the tubes are under load. To address microphony, the guitarist usually has no choice but to replace the affected tube.

Undefined Sound
If an otherwise excellent-sounding amplifier suddenly produces dull undertones or simply stops producing sound, various causes may be at play. In most cases, an outdated tube inside the amp is behind such symptoms. However, other defects can also prevent the expected tube sound from unfolding as intended.
Total Failure
 As always with electronic devices, troubleshooting is the first step toward the proper amplifier repair in tube amplifiers. To identify which part in the signal chain is defective, we must proceed in a structured and methodical manner. In the following steps, we will check each component one by one and, if in doubt, quickly and securely identify the defect and repair it in the right place. In troubleshooting, it also matters what type of tube amp is involved. Hi-fi tube amplifiers are subject to different stresses and may have different problems. Today, we are mainly focusing on guitar amps, but the steps for fault identification can also be applied to the amplifier repair of a hi-fi tube amplifier!
Step 1: Cables

Firstly, in amplifier repair or when a defect occurs, all cables to and from the amp should be checked. This particularly includes:
- Instrument cables
- Possibly patch cables between individual effects devices
- Possibly cables for footswitches for channel changes
- Speaker cables
- Possible recording cables
- Power cables for the amplifier
- Possibly power cables for effects devices
Each of these listed cables can lead to errors in the signal chain. Often, a seemingly serious defect in one’s setup can be fixed by simply replacing a cable, making amplifier repair unnecessary. If the defect persists after changing and checking the cables, we move on to the next step.
Step 2: The Guitar
Problems associated with the amp often arise in the electric guitar itself. Fine wiring of potentiometers, pickups, and output jacks is also prone to susceptibility to faults. The easiest way to exclude the guitar as a source of interference is to connect a completely different guitar to the amplifier. If this option is not available, the guitar can also be checked:
- Test individual pickup positions
- Check potentiometers by adjusting them during operation
- Check the output jack
- Does the fault persist with the volume potentiometer turned down?
If the guitar is also ruled out as a source of the fault, we move on to Step 3 of amplifier repair.
 Step 3: Speaker
Defects associated with the amp often also arise in the speaker. The fundamentally very solid instrumental speakers can also have faults. Loosening speaker chassis, defective membranes, or incorrectly connected speaker cabinets can also have undesirable effects on the sound. Here, the only solution is to gradually eliminate potential sources of error – the entire box can possibly be replaced with another to identify it as the source of the fault.
Step 4: Effects Devices
Effects devices are a true source of possible faults. The delicate electronics of these devices are compressed into a small space and can quickly lead to problems or sound losses depending on usage. The simple way to rule out effects devices as a source of error is to connect the guitar directly to the amp using an instrument cable (previously checked). If the fault persists, the stompboxes can be ruled out as the cause of the problem, and amplifier repair can begin.
Step 5: The Amplifier
In a tube amplifier, various components can lead to defects. To locate the exact source of the fault and begin amplifier repair, the signal path must be followed precisely, and individual components must be excluded one by one. Since the symptoms of the defect can vary, not all of the steps listed need to be performed. However, it is advisable to carry out this test from A to Z if the defect is completely unknown and the amp refuses to work.

Caution: Inside an amp, there are extreme voltages in operation. Anyone unsure which components they can touch should definitely stay away from the electronics! The use of transformers and other components can create life-threatening voltages that may persist even after the amplifier is turned off.
Power Supply
Firstly, it should be checked whether the power supply of the amplifier is functioning correctly. If all indicator lights remain dark when the amp is switched on, this may indicate a defective fuse or a faulty power connection and can guide the direction of amplifier repair. Experienced electricians can use measuring devices to determine whether the power supply and power are in order and repair the amplifier; less experienced guitarists should consult a professional for amplifier repair!
 Tubes
Tubes
If the amp is running but the sound is unsatisfactory, the tubes should be considered first in the context of amp repair. Defective tubes can cause various problems, usually related to sound losses, interference, or microphony. There are several ways to identify a defective tube and repair the amplifier. Completely broken tubes can be identified by a simple visual inspection: blackened glass, mechanical defects, or a non-glowing filament during operation are sure signs of a defective tube. If all tubes are lit and the defect persists, the tubes should be checked with the so-called tap test. To do this, a fine wooden stick is used to gently tap on the electron tubes while they are in operation. Defective tubes will reproduce the audible tapping much more strongly than tubes that are still intact. Tubes prone to microphony will send a true feedback storm when touched.
Potentiometers and Controls
Does the annoying noise only occur when a specific control or potentiometer is used? To determine this, all potentiometers and controls should be moved during operation. Often, a dirty potentiometer can be quickly repaired.
Caution: When caring for controls and potentiometers, a suitable cleaning agent should be used! Products like DeoxIT offered by Caig Laboratories are excellent for maintaining these delicate components.

DIY vs. Professional
Guitarists tend to repair their equipment themselves for as long as possible. We are aware that this is a big part of our shared hobby! However, when working on amplifiers, another crucial factor comes into play: safety. As mentioned earlier, there can be extreme voltages inside the amplifier that can lead to serious injuries or even death if handled improperly.
The rule of thumb for amplifier repair is, therefore: Whenever it is not clear what a specific component does and which component can be touched safely, the attempt at amplifier repair should be aborted, and a professional should be consulted!
However, not every small defect requires a trip to the repair shop to repair the amplifier. The most common sources of errors are not found in the electronics of the amplifier itself but rather in the periphery or with the tubes. A fault-finding search, as described at the beginning of this article, can help discover this defect and prevent costly repairs. We wish you success in repairing the amplifier!
___________________________________________________________________________________________________________________________
Image Sources:
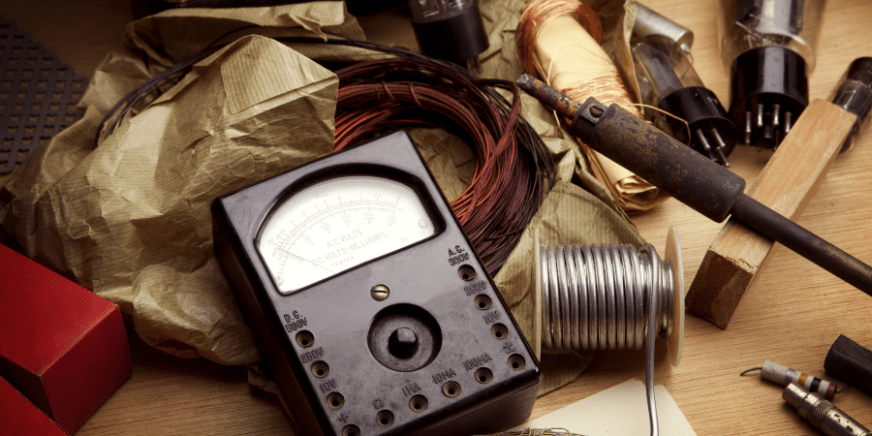
Header Image (Tools for Amplifier Repair): © Kenjo – stock.adobe.com
Image No. 3 (Amplifier tube held and examined by a hand): © taraskobryn – stock.adobe.com