« DIY for guitarists »
It’s not only amps and speakers which require regular care and attention; the electric guitar itself also has to be in a technically perfect condition to deliver the best possible sound. In addition to optimising the playability through various settings on the instrument (neck curvature, string positions or pickup height), the maintenance, care and repair of the guitar’s electronics is another of the tasks of a DIY guitarist. But don’t worry: you don’t have to be an electrical engineer to repair or replace guitar parts! We’ll show you which components you can replace yourself, provide an overview of possible problems defective components can cause, and give tips for repair.
Electronic components of electric guitars – an overview
Electric guitars are made up of various components, only a small number of which are even noticed during normal playing. But in addition to the wood and strings, there are a lot of small spare parts which can cause critical errors if they have a defect. In order to get a good overview of which guitar parts could be affected, we’ll briefly present the most important parts and give tips on possible errors and their solutions/repair:
Pickups
Electric guitar pickups are responsible for transforming the vibration of the string into an electrical signal. These guitar parts consist of magnets and a coil, which creates an electro-magnetic field. The magnetic strings of the instrument oscillate through the magnetic field when strummed and ensure a change in the voltage – the signal is passed on to the output jack and finally to the amplifier further on via the internal wiring.
Pickups for guitars are usually offered as a humbucker (two coils in one pickup, typical for Les Paul-style guitars) or singlecoil (one coil, typical for stratocaster or telecaster).

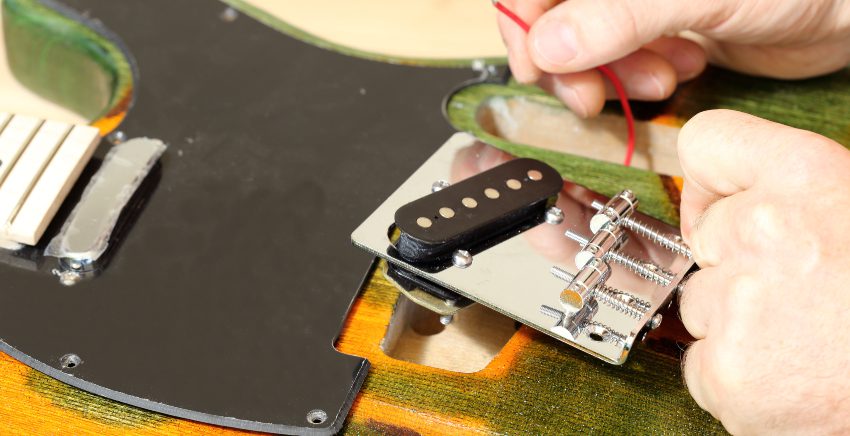
Replacing pickups
Pickups rarely cause problems; their design is usually rock-solid. Nevertheless, detached connections or poor workmanship may make a change necessary. A particularly common problem is the microphony of the guitar parts: minimal vibrations can cause disturbing noises like beeping or feedback.
However, a far more common reason for changing pickups is the desire for a new sound – they can change the sound of every instrument significantly!
To replace a pickup, the procedure should be as follows:
- Identify the defective or replaceable part
- Note the size and design of the pickup (humbucker or single coil, with cover or without, etc.)
- Remove the strings, loosen the mount
- Disconnect the cable from the electronics (plug connection or solder joint)
- Remove the pickup
- Insert and attach a new one
- Reconnect the cable (plug connection or solder joint)
- Set the pickup height and orientation
- Test
Attention: When switching to active pickups, there must be enough space for a power supply (usually a 12V block battery)!
Potentiometer
The signal strength and tone of the pickups can be influenced through the use of potentiometers. Depending on the structure of the respective electric guitars, the instruments have separate potentiometers for tone and volume for each built-in pickup.
By using special potentiometers (push-pull, or push-push), special sound effects can also be created. From the famous “out-of-phase” circuit to splitting humbuckers, everything is possible!

Replacing potentiometers
Old or defective potentiometers can cause problems over time. The most common are scratching noises when operating the potentiometers. While a thorough cleaning of the potentiometers can often solve this, you may also have to repair one or more potentiometers of the guitar.
To do this, it’s best to proceed according to the following pattern:
- Identify the defective potentiometer
- Open the electronics compartment and loosen the solder joints on the potentiometer (mark the cable!)
- Remove the potentiometer knob and loosen the screw connection
- Insert a new potentiometer and spare parts (note the dimensions and shaft length!)
- Screw and solder
- Test
Tip: If you’re replacing the entire electronics of the instrument or several potentiometers, TAD also offers pre-wired kits and suitable spare parts.
Capacitors
On the way from the strings to the output jack, the signal of the instrument passes the potentiometers. In order to support and hone the work of the potentiometers, special capacitors are often soldered in.
The different combinations of capacitors and the exact wiring of the pickups and potentiometers achieve different effects. Iconic guitarists like Jimmy Page have often put their hands to it and invented their own circuits in order to further perfect their unique sound.
")
Replacing capacitors
Finding defective capacitors in electric guitars requires a lot of experience or the appropriate measuring devices. If you want to optimise your own sound by changing capacitors, you have a wide range of special capacitors to choose from.
To replace capacitors, you need to work with the internal wiring of the instrument, depending on the design in the electronics compartment or on the pickguard, which houses the electronics of stratocaster-like guitars and accommodates the spare parts of the guitar.
Pickup selector switches
Most modern electric guitars have two or three pickups, which can be combined differently or selected individually using selector switches. The tonal difference in sound between them is based on the positioning of the pickups on the guitar body (and the vibration of the strings which is changed there) and on structural differences of the guitar parts.
Neck pickups usually play a little warmer and rounder; they’re used for musical solos and full sounds. The bridge pickup delivers the perfect rhythm sound: accentuated and tight, clear riffs can be played here. For selecting pickups, there are all kinds of guitar switches to use. Classic 3- or 5-way switches, rotary switches and other variants are used.

Replacing the pickup switch
If the selector switch for the pickups no longer works, they can no longer be cleanly switched. In the worst case, the guitar will no longer deliver a signal at certain switch positions.
In order to repair or replace the pickup selector switch, as a rule, only three cable connections need to be re-soldered – however, depending on the guitar type and design, there may be differences in the spare parts for guitars here.
Output jack
The output jack delivers the signal of the pickups to the plugged-in instrument cables and is usually designed as a mono jack. However, stereo outputs are also used, especially in combination with unusual pickup combinations. In addition to signal forwarding, however, these jacks also have the task of holding the guitar cable firmly in place.
Repairing the output jack
A defective output jack is usually noticeable from an annoying crackling noise. Poorly fitting cables are another indication that the output jack needs to be repaired or replaced. Although work in the electronics is necessary to replace the guitar parts, it can be done relatively easily – these spare parts for guitars only have a few cable connections (distinguish between mono and stereo!).

Replacing guitar parts yourself – conclusion
Inside the guitar, a lot of electronic guitar parts work hand in hand to deliver the sound to the amplifier. If one of these components fails, this can lead to serious defects. Fortunately, most of the work on the electronics of an electric guitar is easy to master with a little patience and some soldering skills. For those who are less keen on experimenting, TAD offers ready-made kits to completely replace the electronics or other parts of the guitar.
___________________________________________________________________________________________________________________________
Image sources:
Title image, repair work on a guitar: © rupbilder – stock.adobe.comS
Soldering work on a screwed-on guitar: © Suguru – stock.adobe.com