« Typical issues that you fix on your own »
Noise or loss of sound quality can dampen the joy of playing and drain all creative energy? Don’t worry – typically, common instrument issues can be quickly and easily repaired by yourself. Besides general hardware, neck, or body damage to the instrument, defects or malfunctions in the internal electronics of an electric guitar are quite common, and problems can occur on the way to the amplifier. In our article today, we introduce some of the most frequent defects and reveal when a DIY guitar repair is possible – including a step-by-step guide to guitar repair and a tool list.
Searching for the source of the problem – systematically identifying the defective part
Defects in the internal electronics of the instrument usually become apparent quickly and distinctly: strong noise, scratching when adjusting a potentiometer, or complete loss of sound typically occur suddenly and unexpectedly. To quickly identify the faulty component and restore full functionality through guitar repair, it’s advisable to start with a fault analysis, as targeted repairs are otherwise challenging. With the help of our four-point system, however, the fault can be swiftly identified, and the repair can commence.”
")
Step 1: Confirming the instrument as the source of the problem
Electric guitar setups regularly consist of a whole range of error-prone devices. Cables, effects units, speakers, and tubes can, in addition to the instrument itself, be the origin of the disruptive issues. It is advisable to initially check the instrument as a possible source of the problem.
For this, the entire equipment typically used is turned on and connected according to the usual pattern. Then, the instrument suspected of having a fault is exchanged for another one. If the defect persists, the fault must be traced in the signal chain from the instrument cable to the speaker. On the other hand, if the issue disappears, the instrument is the cause of the defect, and the repair can proceed.

Step 2: Check the potentiometers
To refine the troubleshooting process, you should now test the individual potentiometers of the instrument one by one and with different pickup configurations. Defective or aging potentiometers can be identified by a scratching sound. If the sound or volume remains completely unchanged when operating a potentiometer, a fault in the component is likely, and the guitar repair begins with the potentiometer.

Step 3: Test the Pickups
Pickups can also contribute to playback errors. This often results from cold solder joints, faulty grounding, or loose connections in the wiring. Therefore, the pickups should be tested one by one. If the issue can be narrowed down to a specific pickup, the fault has been identified, and the repair can begin. If the problem occurs with all pickups, the search continues.

Step 4: Output Jack, Switch, and Grounding
The final stage in the troubleshooting process for is to examine the remaining electronics: Defective switches can be identified by systematically cycling through the options. Poorly soldered output jacks can result in loose connections, while inadequate grounding can lead to unpleasant background noise.

Everything off – what to do when there’s complete signal loss?
All the mentioned testing steps only work when a signal reaches the amp. If that’s not the case, the signal path should be traced. Starting from the output jack, each component should be inspected individually. Successively, all solder joints and cable connections should be checked to initiate the repair in a targeted manner.
By the way: Strings also have an influence on the function of the electric guitar. And many beginners have tried to play their electric guitar with soft nylon strings, so taking a look at the strings is not forbidden, especially when dealing with unfamiliar instruments!

DIY guitar repair – our guide for common issues
Once the issue is identified, it’s time to repair the electric guitar. Most problems can be fixed quickly and with minimal effort. We present three common issues and their solutions.
Replacing potentiometers – Step-by-Step guide for guitar repair
The parts of the guitar’s electronics that tend to age the quickest are the potentiometers. These small rotary resistors are used to adjust the volume and tone of the pickups. A faulty potentiometer is noticeable by scratching and crackling when operated. Fortunately, repairing an electric guitar is a quick and straightforward process.
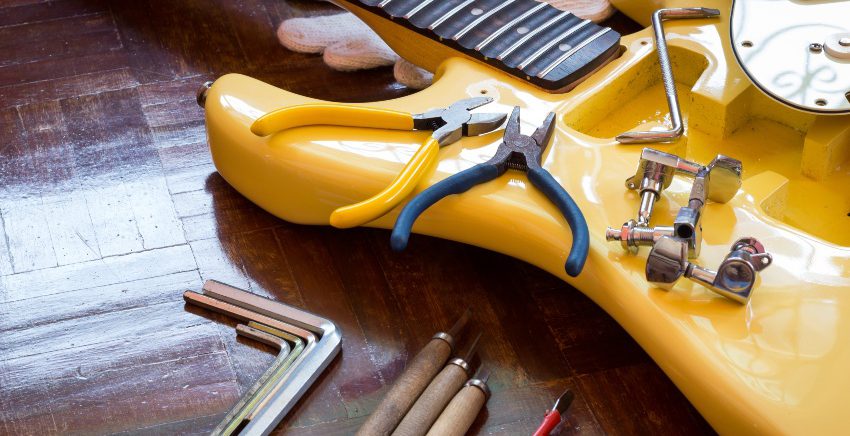
Required tools
- Soldering iron with accessories
- Appropriate replacement potentiometer
- Combination pliers, wire cutters, screwdriver, and wrench
- Soft cloth
- Spare parts

Repair Guide
- Identify the faulty potentiometer and obtain the appropriate guitar replacement parts (pay attention to dimensions, design, and resistance values)
- Open the electronics cavity with a screwdriver
- Take a photo of the inside of the cavity – important for later reference (see Step 9)

- Cover the body with a soft cloth to protect it from damage
- Desolder the old potentiometer and remove any remaining solder
- Carefully remove or detach the potentiometer knob
- Remove the old potentiometer with a locknut
- Insert the new component and secure it with a locknut
- Solder the existing wires to their respective leads (refer to the photo from Step 3)
- Test, and if it functions well, reassemble and close everything up
Changing Pickups – Step-by-Step Guide for Guitar Repair
Pickups are generally very robust components and can be played for many decades – just look at the priceless Les Paul models from the late 1950s! However, over time, it may become necessary to replace a pickup, even if it’s just to alter the guitar’s sound. The use of a soldering iron is not always necessary, as modern active pickups sometimes use plug connections. We present the classic, “hot” method.

Required Tools
- Soldering iron with accessories
- Appropriate pickup/pickups
- Combination pliers, wire cutters, screwdriver
- Soft cloth
- Spare parts
Repair Guide
- Remove the strings
- Unscrew the pickup frame with a screwdriver
- Detach the pickups from the frame using the mounting screw
- Take a photograph of the existing setup’s wiring
- Open the electronics cavity
- Take another photograph of the wiring
- Disconnect the cable connections of the pickups
- Remove the pickup, prepare the new pickup and spare parts
- Thread the cables through the channel to the electronics cavity, solder them
- Secure the pickups in the frame and adjust them to the desired height (by eye)
- Attach the frame, restring, and test

Replacing a Faulty Jack Socket – Step-by-Step Guide for Guitar Repair
Replacing a faulty jack socket is probably the quickest job in electric guitar electronics. Output jacks can cause annoying loose connections or complete loss of sound – having a replacement socket as guitar spare parts is almost mandatory for every guitarist!
Required Tools
- Soldering iron with accessories
- Combination pliers, wire cutters, screwdriver
- Soft cloth
- Spare parts
- Appropriate jack socket
 Metall, offen, mono")
Step-by-Step Repair Guide
- Unscrew the cover plate to expose the socket
- Protect the body with a soft cloth
- Take photographs of the solder joints
- Remove the wiring from the socket
- Solder the new socket following the old diagram (see photo)
- Insert the cover plate and test the socket
Guitar Repair – Conclusion
A malfunctioning guitar can quickly ruin the enjoyment of playing, but the good news is that most electronic defects can be resolved with a bit of skill and soldering experience. While structural damage to the neck, body, or headstock should be handled by a professional, smaller repairs can be done in a DIY manner. It’s essential to document each step of the work and handle the soldering iron with precision when repairing an electric guitar. When choosing high-quality guitar spare parts and tools, make sure to pay attention to the appropriate measurements and values. With these considerations, a successful guitar repair is well within reach!
______________________________________________________________________________________________________________________________
Image sources:
Title image: © princeoflove – stock.adobe.com
The guitarist turns the tone knob: © Johnstocker – stock.adobe.com
Guitar cable and guitar: © bizoo_n – stock.adobe.com
Electric guitar, close-up of guitar strings: © maxkolmeto – stock.adobe.com
Guitar with the backplate removed: © chavalitpanguta – stock.adobe.com