« What can I do? »
Every now and then a guitar amplifier needs to be repaired. What kind of damage can occur which can be repaired in a DIY procedure? When should a specialist take charge and when is a complete replacement necessary? What are the possible costs? Today we’ll show the typical repair and maintenance work, reveal which components are particularly vulnerable and for which work it’s best to ask a specialist.
The great sound of tube amplifiers inspires guitarists all over the world
It’s not for nothing that this almost antediluvian technique is experiencing a real renaissance among guitarists. But the natural sound of valves has one disadvantage: tube amplifiers are more maintenance-intensive than their solid-state counterparts. The electron tubes themselves behave almost like living components and change permanently over the course of their lives. So, what can you do? If you want to use your beloved guitar amp for decades without any defects or sound reductions, the tech-savvy guitarist will have to perform some kind of repair work overtime.
Attention: Our article mainly deals with a repair on a tube-operated amplifier. Other tools and measuring devices are sometimes used for transistor amps!

DIY guitar amplifier repair – basics
To carry out work on the amplifier successfully and, above all, safely, DIY guitarists need some tools and, above all, a certain basic understanding of valve technology. Here are the basics:
Safety first!
In principle, repair on a guitar amp is no more dangerous than any other work on technical equipment. But to protect people and technology from dramatic consequences, here are the most important safety instructions on repairing guitar amplifiers:
Turn off the power
As simple as it sounds – not de-energising the guitar amplifier is one of the most common and dangerous mistakes during repair. Just unplugging the mains plug isn’t enough to completely discharge the capacitors and other components!
Of course, once you’ve decided to set your hand to it yourself and fix the defect, you should also get to it quickly. However, the voltages generated inside the amp are absolutely life-threatening and have to be discharged first. After unplugging the mains plug, this takes about 20 minutes. Make sure you wait this long before each repair and then proceed with caution! Insulating gloves can also help – in principle, however, the DIY technician should be sure which components can be dangerous and which cannot.

Cautious working
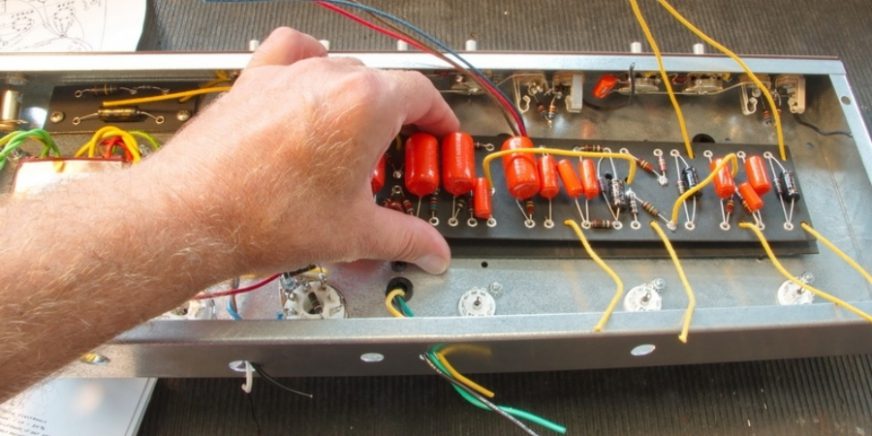
Inside the guitar amp are countless solder joints, fine wires, contacts and resistors which are extremely sensitive to touch and external influences. Care should be taken here, especially when repairing the inside of the amp.
Otherwise, a small problem will quickly turn into a full-blown catastrophe.
Observe blueprints, take photos!
The topic of “troubleshooting” in particular often causes us to disassemble amps and components down to the smallest unit and regret the DIY repair later. To prevent yourself sitting in front of an unsolvable puzzle later, we recommend that you have the construction plan of the respective amp at hand. Photo documentation of the individual work steps also makes the subsequent repair much easier!
Tools needed for repairing guitar amps
To start work inside a guitar amplifier, the inclined hobbyist needs a lot of more or less familiar amp tools. Here is a short, non-exhaustive list:
- Screwdriver
- Pliers
- Soldering iron, soldering tin and “third hand” for soldering work
- Multimeters for measuring resistances and currents
- Electrical tape
- Tweezers
- Wire
- Spare parts
Once you assembled everything and you’ve studied the blueprint again, we can start! Here we have the most common operations on a guitar amplifier:

Common operations on a tube amp
Suddenly the sound is gone, the tone is rattling and tinny, nothing works anymore? Even valve amplifiers give up the ghost now and then – it’s a good thing that most errors can be fixed. Here are the most typical DIY projects on a guitar amplifier, which can be repaired by a layperson without too many worries.
Valve replacement
The classic among DIY projects is changing old, defective, and bad-sounding tubes. Since today we’re talking about the question of how to repair your guitar amplifier, we mainly want to take care of replacing defective valves. The best way to do this is to proceed in three steps:
Identify the defective tube
Valves have the particular feature of not always being broken in a way which can be seen from the outside. In order to identify the defective valves, the visual test should be done first.

Do all the valves light up when the guitar amplifier is on? Has a whitish coating formed? Has one turned black? If nothing can be detected with the naked eye, the so-called tap test can provide some information. While it is running, tap the tubes very, ve
ry gently. Wooden sticks are especially suitable for this. If the defective piece gives an unpleasant, loud feedback when touched, it’s tending towards microphony and should be replaced.
If this test does not produce a result either, only replacing individual tubes one after the other will help. Or, for a better repair, replace the entire set!
")
Remove tube
In order to remove the defective valve, first of all, the casing of the amp should be opened up. In most cases, the sensitive valves will be protected from accidental contact or damage by a grid or cage.
Depending on the design, the valves themselves are plugged into the socket of the amp and can be removed by hand. The operation can cause high temperatures. Therefore, it should only be removed when the amp has had enough time to cool down.
Select and insert a new tube
After the defective valve has been removed, a new one can now be inserted. As well as the design, the socket and the bias or quiescent current of the valve also has to be taken into account. To achieve the best possible results and sounds, the quiescent current of the amp must be reset when changing the valve – unless it’s an amplifier with automatic bias.
After the replacement has been made, all the brackets and safety devices must be reinstalled, and the guitar amp must be closed.
Repair scratching pots and contacts
In addition to the valves, a guitar amplifier also has other components which are prone to wear and tear, which always need attention over time. Pots and contacts in particular tend to clog up over the years and produce unpleasant extraneous sounds – after all, who’s never heard of a “scratching pot”?
 Guitar Potentiometer, split shaft")
But don’t worry: to get a pot or contact working again, you only need a little expertise – given the right means! Again, three steps are enough for a complete repair:
Identify defective pot / contact
Unlike tubes, defective pots and contacts can be detected quite easily: because of their function, they usually only introduce unpleasant background noise into the sound if they’re being actively used. With potentiometers, a scratching noise can only be heard when the guitar amp is switched on and the pot is being used. Does the sound distort for a short time when adjusting the volume or reverb? Then you’ve identified the villain and a repair is needed! Defective contacts can also be detected accordingly – here the input and output sockets are put under a lot of stress over the years and so they can become more susceptible to malfunctions.
Clean the pot / contact
Once the culprit has been discovered, you’ll need to clean the components. Most often, it’s contamination of the contact surfaces which is responsible for a scratching pot. To remove these impurities, we recommend the excellent products from CAIG Laboratories – the Deoxit series is very suitable especially for fine components!
Attention: Under no circumstances should you work with contact spray over a large area during the repair! The spray resinifies the inside of the guitar amp so it only ensures an improvement in the short term! All means should be used wisely and sparingly!

Test run
After cleaning the part, the scratching and noise should have gone away. If this isn’t the case, there may also be a complete defect. Exchanging contacts or potentiometers is much more difficult and complicated – especially with expensive boutique guitar amplifiers, only professionals should do this!
No DIY – only a professional will help here!
So, a whole series of everyday maintenance and repairing of defects can therefore be carried out on the guitar amplifier itself. But at some point, a specialist has to take charge of the repair. Specifically, work with transformers, power supplies and valve sockets should best be left to a professional due to the high voltages. Also, exchanging condensers and work on the basic wiring diagram of a guitar amplifier can only be recommended for experienced technicians.

If you’re interested in understanding a guitar amplifier from scratch and building your own, we recommend the complete amp kits from TAD – great sound and advanced training all in one, so to speak!
___________________________________________________________________________________________________________________________
Image sources:
Glowing tubes in operation: © Avantgarde – stock.adobe.com
Visual inspection tube (fingers hold tube): © taraskobryn – stock.adobe.com