« Replacing an amplifier tube – a general guide »
A warm, lively sound with high dynamics and an organic acoustic pattern – that’s what we love about the sound of electron valves. As well as all the benefits of tube-operated amplifiers compared to transistor devices, there’s also one major disadvantage: the maintenance and care of a pure tube amp is more intensive and time-consuming.
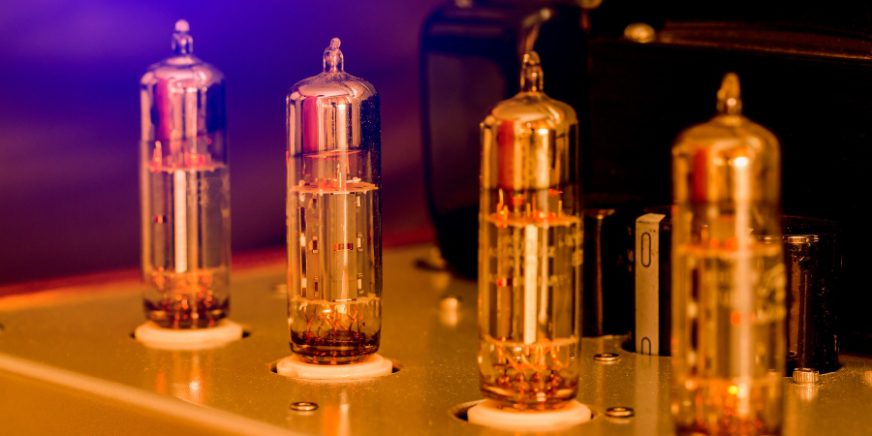
Amp tube replacement
While at most only a few electrolytic capacitors will have to be replaced over the lifetime of a transistor, in the case of a tube amplifier a replacement will occur sooner or later. Of course – changing an amplifier valve doesn’t always have to be related to a defect. After all, new valves offer a fresh sound, which can emphasise individual characteristics of the amp depending on the configuration.

So we don’t consider changing a valve to be a necessary evil, but rather an exciting excursion into the interior of our amps – a part of our passion and yes: As a hobby.
Basic information about the replacement of valves
In order to tackle some of your uncertainty and nervousness before your first amp tube replacement, we’ve written a general guide to replacing electron valves. This guide will show you three steps which will make your own sound with a new splendour:
- Detecting the defective amplifier tube
- Selecting the correct valve for the amp
- Installing the part step by step

Amp Tube replacement – Detecting the defective amplifier tube
Let’s assume that the upcoming replacement isn’t meant to be an experiment for new sound variants, but is about repairing the amp. So, first, you’ll need to determine whether one of the preamp or power amp tubes in the device is defective.

Thankfully, in the sense of repair, there are of course visible defects on the valve – cracked glass bodies, black tarnished spots or amplifier valves which no longer shine. However, as a rule, these defects are rare; what’s more common is the slow “death” of individual valves.
Since the sound of a tube amp always changes during its lifetime – analogue technology “ages” like a living organism – a dying valve often remains hidden for a long time, especially for beginners. But first there are signs which can be recognised and, especially, heard:
First signs of a dying amplifier tube
“Ears have no memory” – this clever phrase describes the dilemma musicians and Hi-Fi enthusiasts are stuck in. Although they sometimes spend several hours a day in front of their amp enjoying the music, the personal listening experience is always different. Their mood, the time of day and the slightest changes in the setup make up the sound of the day.
To recognise a slowly dying amplifier valve in this constantly changing backdrop requires excellent hearing. But there are also exceptions, which especially relate to preamp tubes. With aging preamp valves, microphony, static and scratching noises creep into the mix. If these disturbing factors are noticeable, it’s important to start thinking about an amp tube replacement. In order to identify the defective or “broken” amplifier valve, there’s one simple, reliable way – the so-called tap test.

The tap test
If you detect interference noises in your own amp which could be related to a defective or ageing amplifier valve, the pre-amp valves can be tested with a light tap. To do this, take a fine wooden stick or pencil and tap (gently!) against the part when the amp is switched on. The defective amplifier valve can be identified by a very loud knock. Working parts without defects make a much quieter “tock” sound.
Before replacing: Detecting defective parts
While slowly dying amplifier valves are sometimes difficult to identify, defective pre-amp or power amp tubes can be detected fairly easily based on the actual damage. Classic phenomena are a glowing anode plate during operation, or a discoloured anode plate when the amp is switched off, a lack of glow on the tubes or a blown heating filament. Apart from these defects, mechanical damage to the amplifier valve is also possible: cracked glass or bent sockets are always a cause for concern!
")
Choosing the right replacement tube
The damaged or outdated amplifier valve has been identified; the decision is clear: the valves must be replaced. Now, it’s important to identify the right types of amplifier tubes for the replacement – thankfully, this is quick and easy to do with the vast majority of amplifiers.
The first point of contact for brand amplifiers is the user manual or online documentation. This will list both the type and the exact specifications. It’s also sometimes possible to deviate from the manufacturer’s recommendations (and this can also benefit the sound), but this is not necessarily advisable, especially for beginners.
When it comes to DIY amplifiers or old models, the documentation may not be available or you may not be able to find it. Only a look at the defective valve will help here. The vast majority of valves will show the type, manufacturer and tube socket – choose matching amplifier tubes of the same type from TubeAmpDoctor and let’s get on with the repair!

Swapping an amplifier tube vs. swapping all the tubes
The valve amp is a sensitive creature. The replacement of important central components such as an electron valve inevitably leads to a change in the overall system.
So whether only the affected tube can be replaced in the event of a fault occurring or whether all the valves have to be chucked out is a philosophical question.
Idealists want their amp to be fitted out with a matched, coordinated set of tubes from well-known manufacturers to get the most out of the components used. More practically minded people only replace the defective parts.
Both paths will ultimately lead to success – the amp will sound again. As a rule of thumb, we recommend making a complete change for older parts which are slowly giving up the ghost. You can feel safe in replacing “spontaneous defects”, as long as the remaining parts are still completely fine.
The big day – amp tube replacement in practice
The defective valves have been identified and a suitable replacement tube has been found, selected and delivered to your home (or to the rehearsal room) thanks to speedy delivery. Now it’s the big moment; time to change the valves. In order for everything to go smoothly during replacement and for the amp to be able to start up again as quickly as possible, the following steps have to first be thought out and then carried out as carefully as possible.

A word of warning
In principle, a tube change on an amplifier is hardly rocket science and can also be carried out by moderately skilled mechanics. Nevertheless, we’d like to take the opportunity to give you a warning:
Preparing for the swap
- First of all, the amp should be disconnected from the power and set up in an easily accessible place with a clean work surface. Before work, the amp should be kept free of power for as long as possible!
- Remove all the cables and devices and get the necessary tools ready (usually you’ll only need a screwdriver and a container for the loosened screws).
- Most valve amplifiers have a cover (usually a grid) which has to be opened to get to the valves. You should now remove this grid; the inside of the amp will be opened up and the operation can begin.

Removing the old tubes
- Valves should never be touched with bare hands, as at high temperatures defects caused by skin and sweat residues cannot be ruled out. Therefore, the use of soft cotton gloves is appropriate here.
- Depending on the type, the components may be held by a clamp. This clamp can be moved aside by a folding mechanism.
- Gently but firmly pull the valves out of the tube sockets. For plug-in connections of tube sockets, always go straight upwards to avoid damaging the socket.
- Carefully store the removed tubes and put them aside.
Installing the new tubes
- Carefully take the new valves out of the packaging without direct contact (gloves!). Check again to make sure you’ve ordered the right components and then put them in the amp.
- The tube sockets of the pre-amp or power amp valves should always be free of dust and undamaged. Carefully insert the amplifier valve into the socket and secure it using a clamp or catch. Now the actual swap is almost done.

3. Last but not least: unscrew the grid, connect the amplifier and start it up. Please don’t put the full load on the tubes straight away – a short acclimatisation period will protect the material!

If all the valves are full and orange again, the first chords can play… Have fun! TubeAmpDoctor is happy to answer questions about suitable valves! Just give us a call or send us an email!
___________________________________________________________________________________________________________________________
Image sources:
Title image: © Koonsiri – stock.adobe.com
Electrically amplified guitar leaning against amplifier: © Zen Duder – stock.adobe.com
Man and woman looking at amplifier: © auremar – stock.adobe.com
Various tubes: © mesori – stock.adobe.com
Electric guitar leaning on amplifier: © George Dolgikh – stock.adobe.com
Electron tubes in one hand: © Евгений Морозов – stock.adobe.com